Let’s Make An IMPACT
Chapter 1: Getting Started
Taking your first steps
In this chapter, we will be taking you through your first steps to integrating Invisalign into your practice. This chapter is made up of six steps.
- Chapter 1: Getting Started
- Chapter 2: Submitting a case to Invisalign and using IMPACT
- Chapter 3: Scheduling and appointment sequence
- Chapter 4: The consultation
- Chapter 5: Aligner delivery appointment
- Chapter 6: Interproximal reduction appointment
- Chapter 7: Refinement “additional aligners” scan appointment
- Chapter 8: Refinement “additional aligners” delivery appointment
- Chapter 9: Debranding and retention
Step 1
Get Certified – The first step in your journey is to become Invisalign certified. See the 123Dentist New Provider Journey – User guide for details on this process.
- After completing the certification program, the doctor should have a basic understanding of how to complete a Prescription and submit a case to Invisalign.
- Upon receiving certification, the doctor may receive additional Invisalign training by attending a virtual or in-person course titled “Fundamentals I”. Subsequently, they may continue with Invisalign’s Intermediate course.
- It is strongly recommended for new Invisalign providers to get certified and take the Fundamentals I course. After completing these two trainings, providers should have a basic background and be able to start treating some minor malocclusions.
Step 2
Get Supplied – Ensure your office has the necessary supplies to perform Invisalign treatment.
Step 3
Clincheck Pro Software – Download the most current version of Clincheck Pro Software onto your primary computer. This can be found in the “Support” section in the Invisalign Doctor Site (IDS).
Step 4
Adopting Best Practises -TBD. This step may be removed. Keep here as a place holder. Waiting to hear from Invisalign how to proceed with adopting Dr. Hamanishi’s “Clinical Preferences”
Step 5
The Invisalign Photo Uploader App – **OPTIONAL BUT RECOMMENDED**: I strongly recommend every clinic have the Invisalign Photo Uploader App. The office may want a designated iPhone or iPad.
- The photos are easy to take and the App will guide you through the photo series
- This App will also sync the photos taken directly into your IDS patient profile
- Most importantly, it has a feature that will assess the difficulty of a case in less than 5 minutes
Step 6
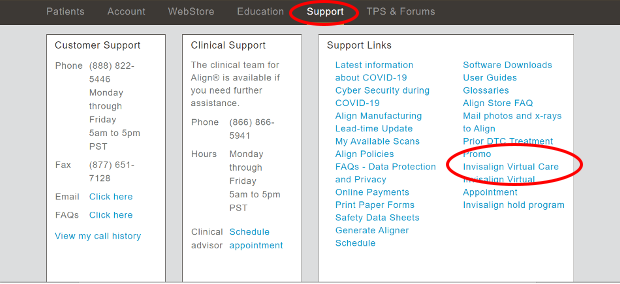
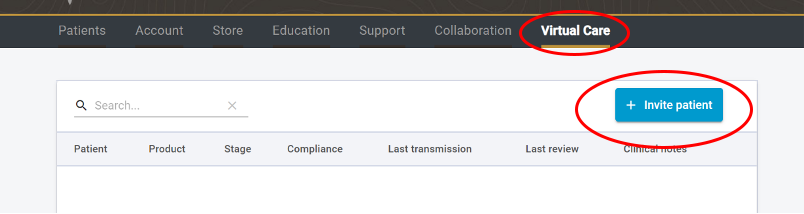
The myInvisalign App and Virtual Care – Become familiar with the myInvisalign App and Virtual Care. First, you will need to enroll in this free service. To do so, under the “Support” tab, select “Invisalign Virtual Care”.
Then, select “Terms & Conditions” and “Accept”
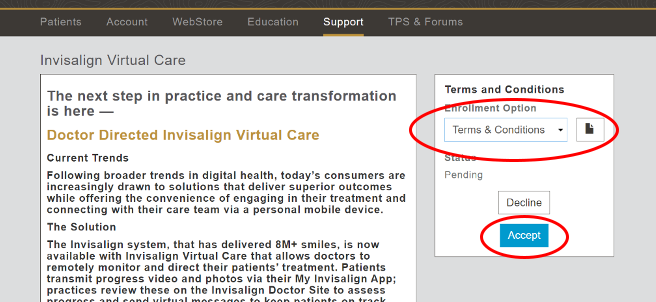
Finally, in your IDS you will see a new tab called “Virtual Care”. You can now start to invite your patients so that their App will enable communications directly through this site.
I highly recommend each new Invisalign Patient download this App onto their phone. It allows them to take photos of their teeth to track their very own progress and make direct contact to their treating doctor. Patients can send these photos through your IDS if they have any specific questions or concerns about their treatment between their scheduled appointments.
This communication tool will save your patients and your office from unnecessary appointments. Please visit https://my.invisalign.com/app to learn more about this App.
Congratulations! You’ve Made it.
You have now completed Chapter 1 of 9 – When you feel ready, click the link below to be taken to the next chapter.